
|
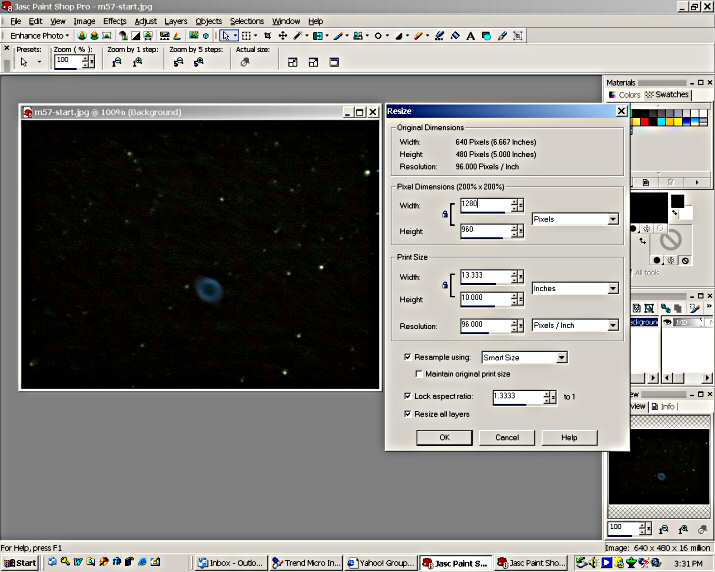
The first step I took was to resize the image to twice its normal size. On small resolution images, such as captured with the LPI camera, I find it helpful to do most of the processing on a larger image scale.
Now use curves to bring out faint detail. Click on the curve and drag the reference point up and to the left as shown until you start to bring out "noise" in the background. One point I would like to emphasize here is to always click on the reset button in the upper right corner of the window before you adjust the curve, or any other tool or filter. It's the little button with the curved arrow in it. PSP remembers, and defaults to, the last settings used. Some PSP features, curves being one, have several parameters that can be set and may not be readily visible when the window is opened. Another tip is to always make sure the "preview lock" and "preview eye" buttons are pressed when you use a tool or filter. These two buttons are located just under the two preview boxes and have little "eye" icons in them. With these pressed, you will be able to view the modifications you are making displayed on the image as you work with it.
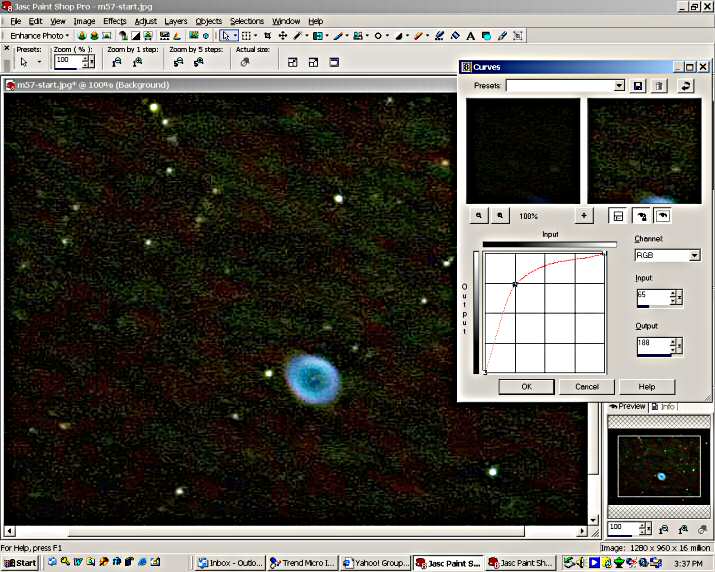
As you can see in the screen shot, the dim parts of the image are brightened but so is the noise in the background. When you increase signal, you also increase noise. This noise must be reduced without eliminating real data. This process will begin in the next step with an application of "Levels" to raise the black point of the image.
|