
|
We will now use curves on the red and green channels individually to reduce the noise in the background. This noise is very dim so we will make the change to the curves using the lower portion of the curve. Remember changes to the upper part of the curve affect the brighter portions of the image and changes to the lower part affect dimmer portions of the image. Now display the curves window. Remember to use the reset button to reset the curve before you make any changes. Select "Green" in the "Channel" window. This allows us to change only the green color and leave red and blue unchanged. Click on the lower part of the curve and drag it down and to the right. The change here does not have to be large as most of the noise has been removed by our previous use of levels.
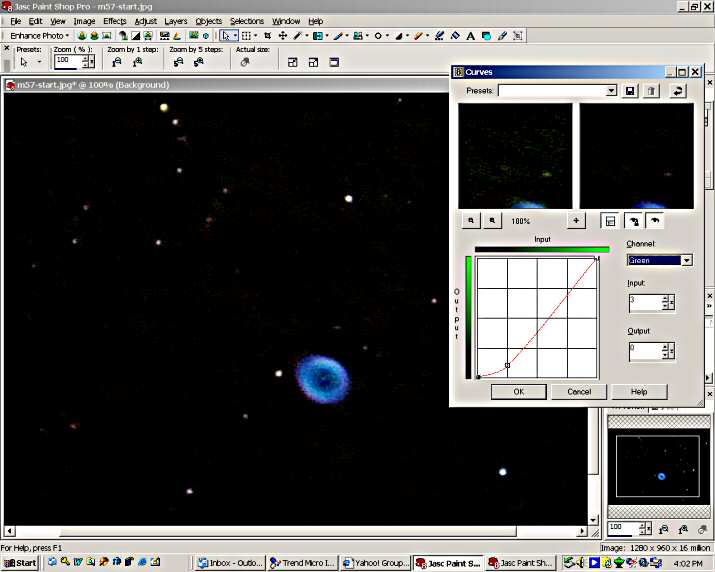
In PSP you can make changes to each color channel in curves before you apply the change to the image. We will now go to the "Red" channel and make the change there before pressing "OK" to apply the color changes. Do not press "Reset" as this will cancel the change made in the "Green" channel. With Red selected pull the lower part of the curve down and to the right.
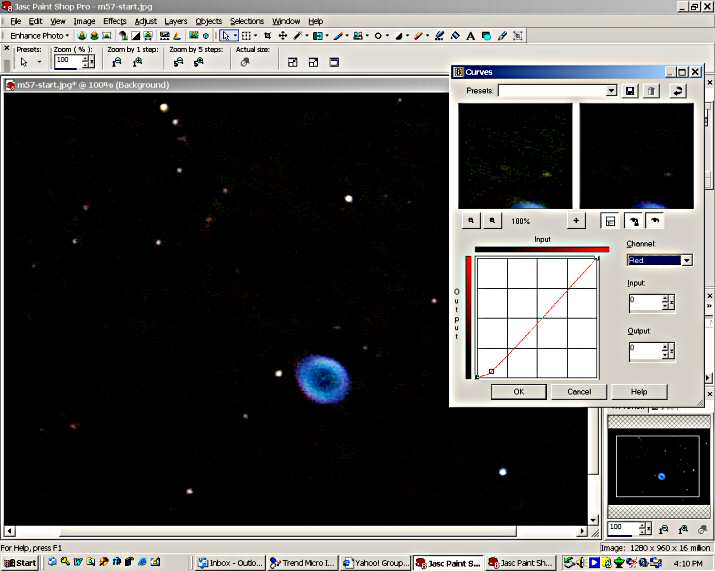
Note that the red noise was a little fainter when we did the check, therefore, the correction to the red curve is lower and not quite as much as was the green correction. Now press "OK" to apply the changes. You can now do another "temporary" check with curves to see if the noise has been reduced to a negligible amount. Remember to reset the curves before you do the check. If noise is still high, repeat the steps above. If you want to cancel what was done, use the "Undo" menu choice under "Edit". To finish the noise reduction apply a Gaussian blur with a radius setting of 2. Use the procedures for this I demonstrated in the first presentation. The background noise has been reduced to an amount we can live with and the stars look natural but the Ring Nebula is way too blue. This is the next element to be corrected.
|